
今回は、現役 Laravel エンジニアの私が、Laravel を使って確認画面のあるフォームを作る方法を述べます。フォームの例として、ここでは新規顧客登録の機能と顧客の情報を編集する機能を持つものを作っていきます。
なお、記事が長めになってしまったので、前編と後編に分けようかと思います。この記事は前編です。
Laravel で開発するにあたってはそのための環境構築が必要ですが、Windows PC に開発環境を構築する方法についてはこちらで述べています。
バージョン情報
以下の環境で動作確認を行いました。
- Laravel 12.3.0
- PHP 8.2.12
- npm 11.2.0
新規プロジェクトの作成
それでは、新規プロジェクトの作成から行っていきたいと思います。すでにプロジェクトがあるという方は適当に読み飛ばして下さい。
まず、Form_with_confirmation という名前で新規の Laravel プロジェクトを作成するために、次のコマンドを実行します。
composer create-project laravel/laravel Form_with_confirmation次に、XAMPP を起動してブラウザで phpMyAdmin を開き、form_with_confirmation という名前のデータベースを作成します。
次に、.env ファイルの 23 行目あたりから次のような記述がありますので、これを次のように変更します。
DB_CONNECTION=sqlite
# DB_HOST=127.0.0.1
# DB_PORT=3306
# DB_DATABASE=laravel
# DB_USERNAME=root
# DB_PASSWORD=
DB_CONNECTION=mysql
DB_HOST=127.0.0.1
DB_PORT=3306
DB_DATABASE=form_with_confirmation # データベースの名前
DB_USERNAME=root
DB_PASSWORD=データベースのパスワードなお、MySQL の root ユーザーにパスワード(.env の DB_PASSWORD に相当)を設定する方法については、こちらを参照して下さい。
JetStream のインストール
ここでは認証機能として JetStream をインストールしたいと思います。ターミナルを立ち上げて、カレントディレクトリが Laravel のプロジェクトフォルダ直下であることを確認して、次のコマンドを実行して下さい。
composer require laravel/jetstreamここで、フロントの開発は Livewire と Inertia のどちらかを選択することになりますが、ここでは Livewire を選択することにします。次のコマンドを実行して下さい。
php artisan jetstream:install livewireここで「New database migrations were added. Would you like to re-run your migrations?」と聞かれると思いますので、「yes」と入力して Enter キーを押してください。
(前略)

  New database migrations were added. Would you like to re-run your migrations? (yes/no) [yes]
❯ yes


   INFO  Preparing database.

  Creating migration table ................................................................................... 31.93ms DONE

   INFO  Running migrations.

  0001_01_01_000000_create_users_table ...................................................................... 137.02ms DONE
  0001_01_01_000001_create_cache_table ....................................................................... 45.73ms DONE
  0001_01_01_000002_create_jobs_table ....................................................................... 117.25ms DONE
  2025_03_20_091241_add_two_factor_columns_to_users_table .................................................... 36.77ms DONE
  2025_03_20_091309_create_personal_access_tokens_table ...................................................... 66.40ms DONE

   INFO  Livewire scaffolding installed successfully.

PS C:\Users\Public\Laravel\Form_with_confirmation>
次に、ターミナルで
npm run devを実行し、別のターミナルを立ち上げて次のコマンドを実行します。
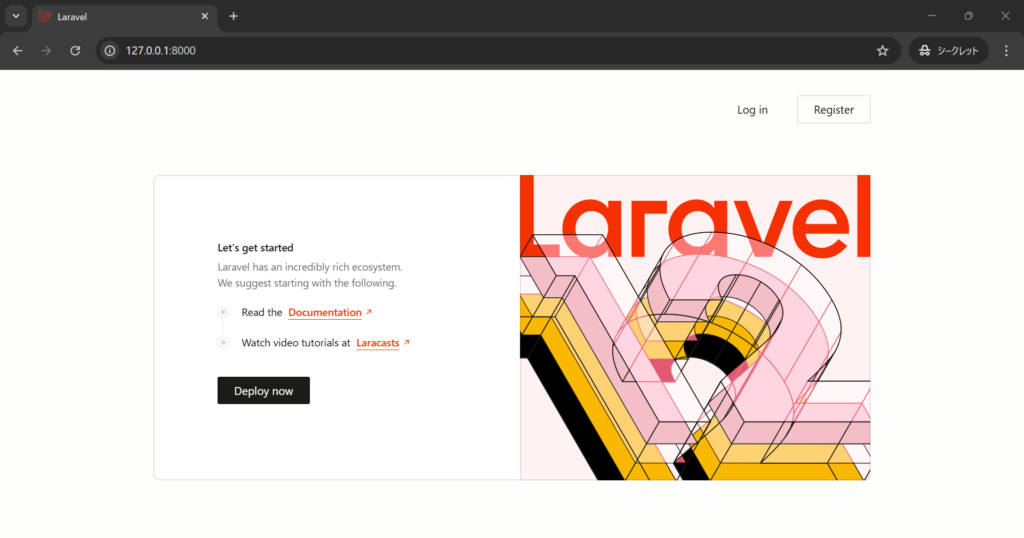
php artisan serve次に、XAMPP の MySQL が起動していることを確認し、ブラウザで
http://127.0.0.1:8000/
にアクセスして下さい。
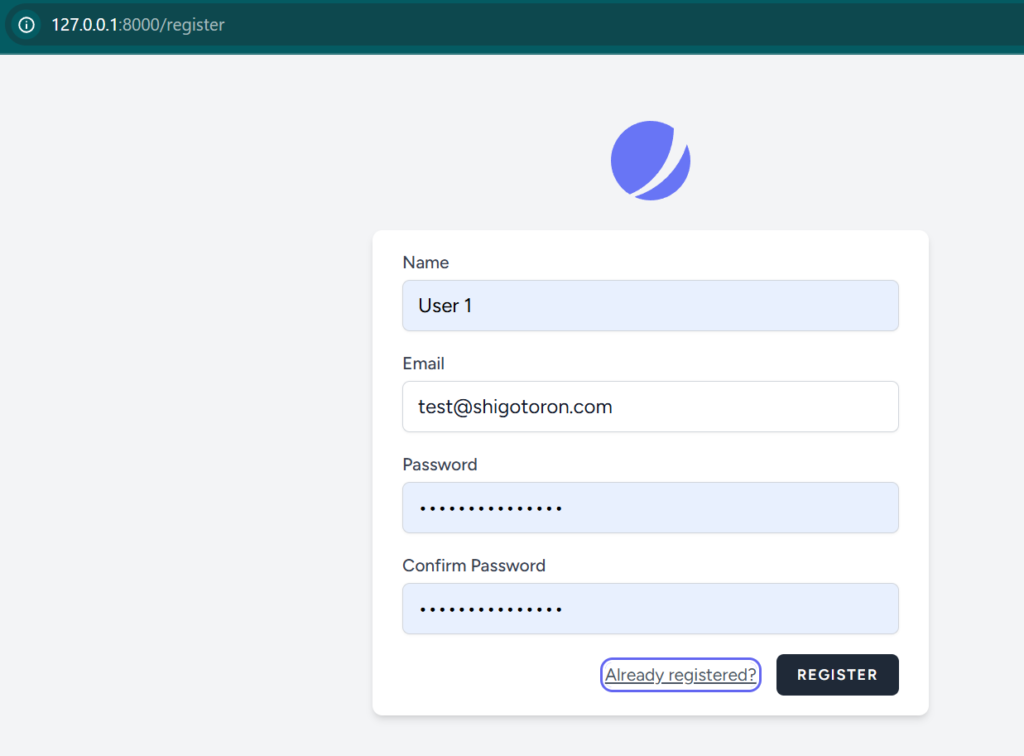
すると、次のような画面になるかと思いますので、Register をクリックしてユーザー登録しましょう。
コントローラーの作成
次のコマンドを実行して CustomerController を作成します。
php artisan make:controller CustomerControllerすると、ファイル app\Http\Controllers\CustomerController.php が生成されます。
<?php

namespace App\Http\Controllers;

use Illuminate\Http\Request;

class CustomerController extends Controller
{
    //
}
ルーティングの設定
次に、ルーティングを設定するために、routes\web.php を次のように編集します。
<?php

use App\Http\Controllers\CustomerController;
use Illuminate\Support\Facades\Route;

Route::get('/', function () {
    return view('welcome');
});

Route::middleware([
    'auth:sanctum',
    config('jetstream.auth_session'),
    'verified',
])->group(function () {
    Route::get('/dashboard', function () {
        return view('dashboard');
    })->name('dashboard');
    Route::get('/customer/create', [CustomerController::class, 'create'])->name('customer.create');
    Route::post('/customer/confirm', [CustomerController::class, 'confirm'])->name('customer.confirm');
    Route::post('/customer/store_or_back', [CustomerController::class, 'store_or_back'])->name('customer.store_or_back');
});
次に、CustomerController を編集して次のようにします。
<?php

namespace App\Http\Controllers;

use Illuminate\Http\Request;

class CustomerController extends Controller
{
    public function create()
    {
        return view('customer.create');
    }
}
新規顧客登録画面の作成
次に、resources\views の中に customer フォルダを作成し、その中にファイル create.blade.php と _form.blade.php を作成します。(_form.blade.php は create.blade.php の中で使うだけではなく、後に edit.blade.php(編集画面)の中でも使います。今回は簡単のため、顧客の情報として入力できるのは氏と名だけにしています。)
<x-app-layout>
    <x-slot name="header">
        <h2 class="text-xl font-semibold leading-tight text-gray-800">
            新規顧客登録
        </h2>
    </x-slot>

    <div class="py-12">
        <div class="mx-auto max-w-7xl sm:px-6 lg:px-8">
            @include('customer._form')
        </div>
    </div>
</x-app-layout>
<form action="{{ route('customer.confirm') }}" method="post">
@csrf
<label for="last-name">氏</label>
<input type="text" name="last_name" id="last-name" class="mr-4">
<label for="first-name">名</label>
<input type="text" name="first_name" id="first-name">
<button type="submit" class="block bg-blue-500 hover:bg-blue-700 text-white font-bold mt-2 py-2 px-4 rounded">
確認
</button>
</form>また、resources\views\navigation-menu.blade.php を次のように編集します(編集された行を強調表示しています)。
<nav x-data="{ open: false }" class="bg-white border-b border-gray-100">
<!-- Primary Navigation Menu -->
<div class="max-w-7xl mx-auto px-4 sm:px-6 lg:px-8">
<div class="flex justify-between h-16">
<div class="flex">
<!-- Logo -->
<div class="shrink-0 flex items-center">
<a href="{{ route('dashboard') }}">
<x-application-mark class="block h-9 w-auto" />
</a>
</div>
<!-- Navigation Links -->
<div class="hidden space-x-8 sm:-my-px sm:ms-10 sm:flex">
<x-nav-link href="{{ route('dashboard') }}" :active="request()->routeIs('dashboard')">
ダッシュボード
</x-nav-link>
</div>
<div class="hidden space-x-8 sm:-my-px sm:ms-10 sm:flex">
<x-nav-link href="{{ route('customer.create') }}" :active="request()->routeIs('customer.create')">
新規顧客登録
</x-nav-link>
</div>
</div>
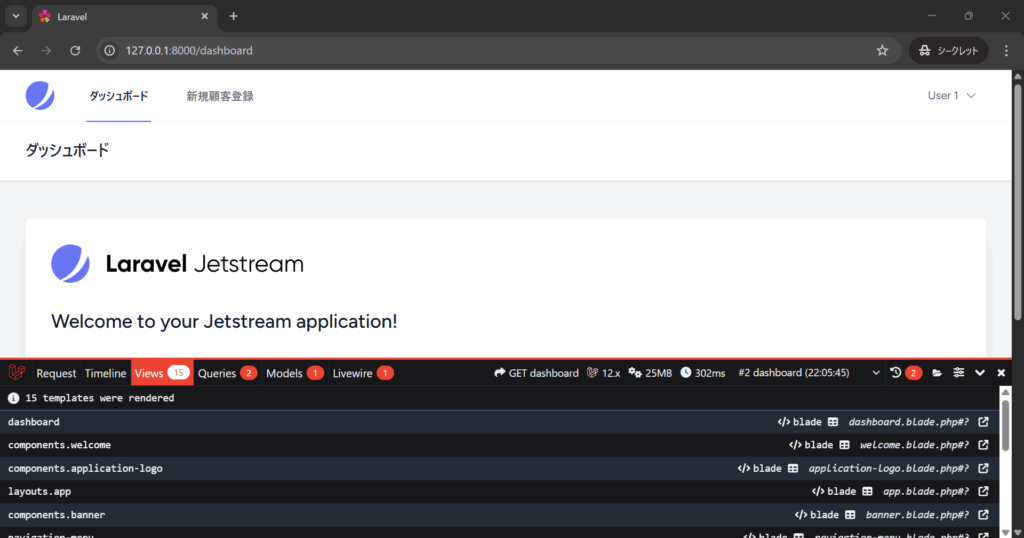
(以下略)次に、resources\views\dashboard.blade.php を次のように編集します。
<x-app-layout>
<x-slot name="header">
<h2 class="font-semibold text-xl text-gray-800 leading-tight">
ダッシュボード
</h2>
</x-slot>
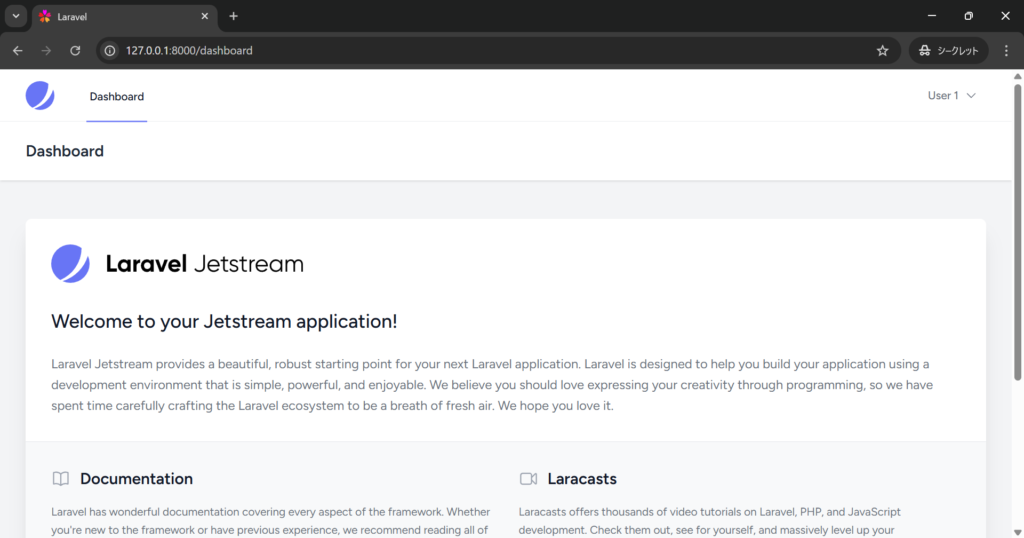
(以下略)ここで、デバッグに便利な Laravel Debugbar をインストールしておきます。別のターミナルを立ち上げて次のコマンドを実行します。
composer require barryvdh/laravel-debugbar --devここでブラウザを確認すると、次のようになっていると思います。
画面上部の「新規顧客登録」のところをクリックすると、次のような画面になると思います。
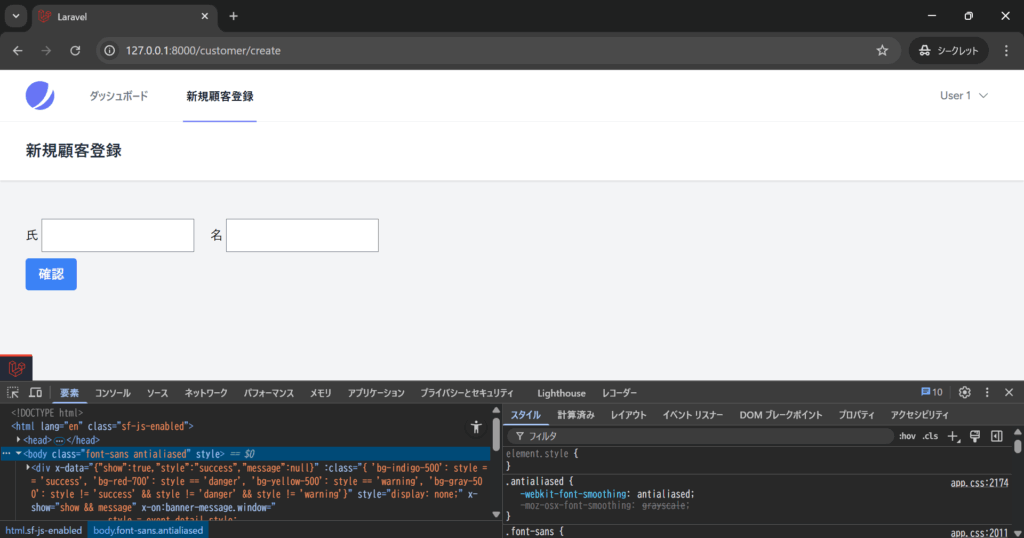
【注意】Tailwind CSS がうまく反映されない場合は、ターミナルで次のコマンドを試してみてください。
php artisan view:clear確認画面の作成
次に CustomerController を編集して confirm アクションを追加します。(バリデーションは今回は省略します。)
<?php

namespace App\Http\Controllers;

use Illuminate\Http\Request;

class CustomerController extends Controller
{
    public function create()
    {
        return view('customer.create');
    }

    public function confirm(Request $request)
    {
        $inputs = $request->only(['last_name', 'first_name']);

        return view('customer.confirm', compact('inputs'));
    }
}
次に、ファイル resources\views\customer\confirm.blade.php を作成し、内容は次のようにします。
<x-app-layout>
    <x-slot name="header">
        <h2 class="text-xl font-semibold leading-tight text-gray-800">
            確認画面
        </h2>
    </x-slot>

    <div class="py-12">
        <div class="mx-auto max-w-7xl sm:px-6 lg:px-8">
            <table class="table-auto border-collapse border border-black">
                <tr>
                    <th class="px-4 py-2 border border-black bg-gray-400">氏</th>
                    <td class="px-4 py-2 border border-black">{{ $inputs['last_name'] }}</td>
                </tr>
                <tr>
                    <th class="px-4 py-2 border border-black bg-gray-400">名</th>
                    <td class="px-4 py-2 border border-black">{{ $inputs['first_name'] }}</td>
                </tr>
            </table>
            <form action="{{ route('customer.store_or_back') }}" method="post">
                @csrf
                <input type="hidden" name="last_name" value="{{ $inputs['last_name'] }}">
                <input type="hidden" name="first_name" value="{{ $inputs['first_name'] }}">
                <div class="flex justify-between">
                    <button type="submit" class="bg-blue-500 hover:bg-blue-700 text-white font-bold mt-2 py-2 px-4 rounded">
                        登録
                    </button>
                    <button type="submit" name="back" class="bg-orange-500 hover:bg-orange-700 text-white font-bold mt-2 py-2 px-4 rounded">
                        戻る
                    </button>
                </div>
            </form>
        </div>
    </div>
</x-app-layout>
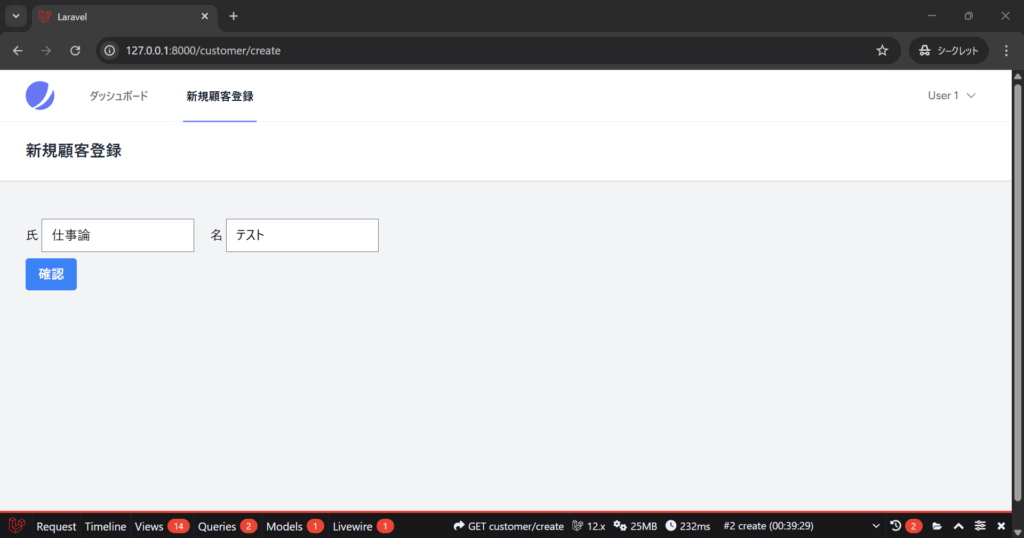
新規顧客登録の画面で何らかの文字列を入力して確認ボタンをクリックすると、次のような画面(確認画面)になります。

続いて、このときに戻るボタンをクリックすると入力値(今回の場合は「仕事論」と「テスト」)が保持されたまま新規顧客登録の画面に戻るようにします。そのためには、withInput() と old() を使います。まず、CustomerController に store_or_back アクションを追加して次のようにします。
<?php

namespace App\Http\Controllers;

use Illuminate\Http\Request;

class CustomerController extends Controller
{
    public function create()
    {
        return view('customer.create');
    }

    public function confirm(Request $request)
    {
        $inputs = $request->only(['last_name', 'first_name']);

        return view('customer.confirm', compact('inputs'));
    }

    public function store_or_back(Request $request)
    {
        if ($request->has('back')) {
            return redirect(route('customer.create'))->withInput();
        }
    }
}
続いて、_form.blade.php の input タグ 2 つに value 属性を追加して次のようにします。
<form action="{{ route('customer.confirm') }}" method="post">
    @csrf
    <label for="last-name">氏</label>
    <input type="text" value="{{ old('last_name') }}" name="last_name" id="last-name" class="mr-4">
    <label for="first-name">名</label>
    <input type="text" value="{{ old('first_name') }}" name="first_name" id="first-name">
    <button type="submit" class="block bg-blue-500 hover:bg-blue-700 text-white font-bold mt-2 py-2 px-4 rounded">
        確認
    </button>
</form>
これで、確認画面で戻るボタンをクリックした場合でも入力値が保持されるようになったはずです。例えば、上で挙げた確認画面から戻るボタンをクリックすると、次のような画面になります。
マイグレーションファイルと Customer モデルの作成
続いて、マイグレーションファイルと Customer モデルを作成します。次のコマンドを実行して下さい。
php artisan make:model Customer --migrationこれで、app\Models\Customer.php というファイル(Customer モデル)とマイグレーションファイル database\migrations\yyyy_MM_dd_******_create_customers_table.php(のひな形)が生成されます。次に、マイグレーションファイルを編集して次のようにします。
<?php

use Illuminate\Database\Migrations\Migration;
use Illuminate\Database\Schema\Blueprint;
use Illuminate\Support\Facades\Schema;

return new class extends Migration
{
    /**
     * Run the migrations.
     */
    public function up(): void
    {
        Schema::create('customers', function (Blueprint $table) {
            $table->id();
            $table->string('last_name'); // last_name という名の String 型のカラムを追加します
            $table->string('first_name'); // first_name という名の String 型のカラムを追加します
            $table->timestamps();
        });
    }

    /**
     * Reverse the migrations.
     */
    public function down(): void
    {
        Schema::dropIfExists('customers');
    }
};
これを保存したら、XAMPP のコントロールパネルにおいて MySQL が緑色になっていることを確認し、ターミナルで次のコマンドを実行します。
php artisan migrateすると、データベースに customers テーブルが生成されているはずです。
データベースに顧客情報を保存する処理を書く
続いて、CustomerController の store_or_back アクションに、顧客情報を(customers テーブルに)保存する処理を書いていきます。CustomerController を編集して次のようにして下さい。
<?php

namespace App\Http\Controllers;

use Illuminate\Http\Request;
use App\Models\Customer;

class CustomerController extends Controller
{
    public function create()
    {
        return view('customer.create');
    }

    public function confirm(Request $request)
    {
        $inputs = $request->only(['last_name', 'first_name']);

        return view('customer.confirm', compact('inputs'));
    }

    public function store_or_back(Request $request)
    {
        if ($request->has('back')) {
            return redirect(route('customer.create'))->withInput();
        }

        Customer::create([
            'last_name' => $request->last_name,
            'first_name' => $request->first_name,
        ]);

        return redirect()->route('dashboard');
    }
}
続いて、Customer モデルを編集して次のようにして下さい。
<?php

namespace App\Models;

use Illuminate\Database\Eloquent\Model;

class Customer extends Model
{
    protected $fillable = [
        'last_name',
        'first_name',
    ];
}
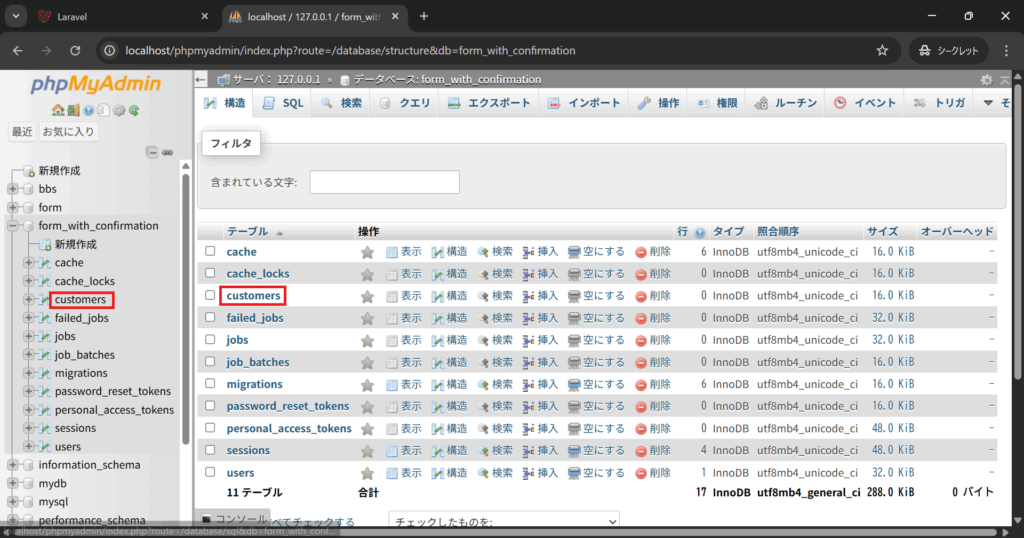
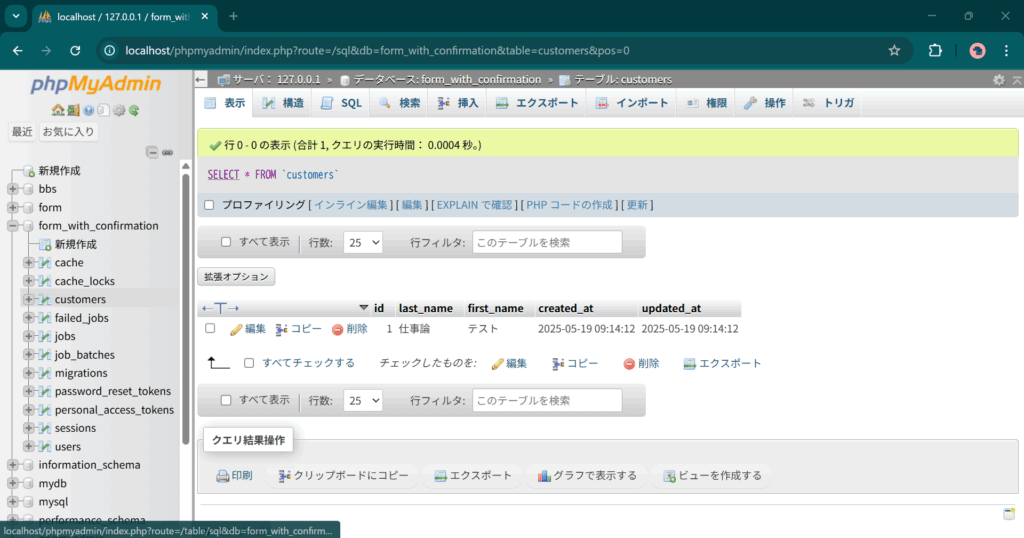
これで顧客情報をデータベース(の customers テーブル)に登録できるようになったはずです。新規顧客登録の画面で何か文字列を入力して「確認」ボタンをクリックして、確認画面で「登録」ボタンをクリックして下さい。そうすると、ダッシュボードにリダイレクトされるはずです。そして、phpMyAdmin で customers テーブルを見てみると、先ほど入力した文字列がデータとして格納されているかと思います。
データベースの顧客情報をダッシュボードに表示する
続いて、customers テーブルの情報をダッシュボードに表示したいと思います。web.php を次のように編集します。
<?php

use App\Http\Controllers\CustomerController;
use Illuminate\Support\Facades\Route;

Route::get('/', function () {
    return view('welcome');
});

Route::middleware([
    'auth:sanctum',
    config('jetstream.auth_session'),
    'verified',
])->group(function () {
    Route::get('/dashboard', [CustomerController::class, 'dashboard'])->name('dashboard');
    Route::get('/customer/create', [CustomerController::class, 'create'])->name('customer.create');
    Route::post('/customer/confirm', [CustomerController::class, 'confirm'])->name('customer.confirm');
    Route::post('/customer/store_or_back', [CustomerController::class, 'store_or_back'])->name('customer.store_or_back');
});
続いて、CustomerController に次のように dashboard アクションを追加します。
<?php

namespace App\Http\Controllers;

use Illuminate\Http\Request;
use App\Models\Customer;

class CustomerController extends Controller
{
    public function dashboard()
    {
        $customers = Customer::all();

        return view('dashboard', compact('customers'));
    }

    public function create()
    {
        return view('customer.create');
    }

(以下略)
続いて、resources\views\dashboard.blade.php を編集して次のようにします。
<x-app-layout>
    <x-slot name="header">
        <h2 class="font-semibold text-xl text-gray-800 leading-tight">
            ダッシュボード
        </h2>
    </x-slot>

    <div class="py-12">
        <div class="max-w-7xl mx-auto sm:px-6 lg:px-8">
            <div class="bg-white overflow-hidden shadow-xl sm:rounded-lg">
                <table class="table-auto border-collapse border border-black m-2">
                    <tr>
                        <th class="px-4 py-2 border border-black bg-gray-400">ID</th>
                        <th class="px-4 py-2 border border-black bg-gray-400">氏</th>
                        <th class="px-4 py-2 border border-black bg-gray-400">名</th>
                        <th class="px-4 py-2 border border-black bg-gray-400" colspan="2">操作</th>
                    </tr>
                    @foreach ($customers as $customer)
                        <tr>
                            <td class="px-4 py-2 border border-black text-right">{{ $customer->id }}</td>
                            <td class="px-4 py-2 border border-black">{{ $customer->last_name }}</td>
                            <td class="px-4 py-2 border border-black">{{ $customer->first_name }}</td>
                            <td class="px-4 py-2 border border-black">XXXX</td>
                            <td class="px-4 py-2 border border-black">YYYY</td>
                        </tr>
                    @endforeach
                </table>
            </div>
        </div>
    </div>
</x-app-layout>
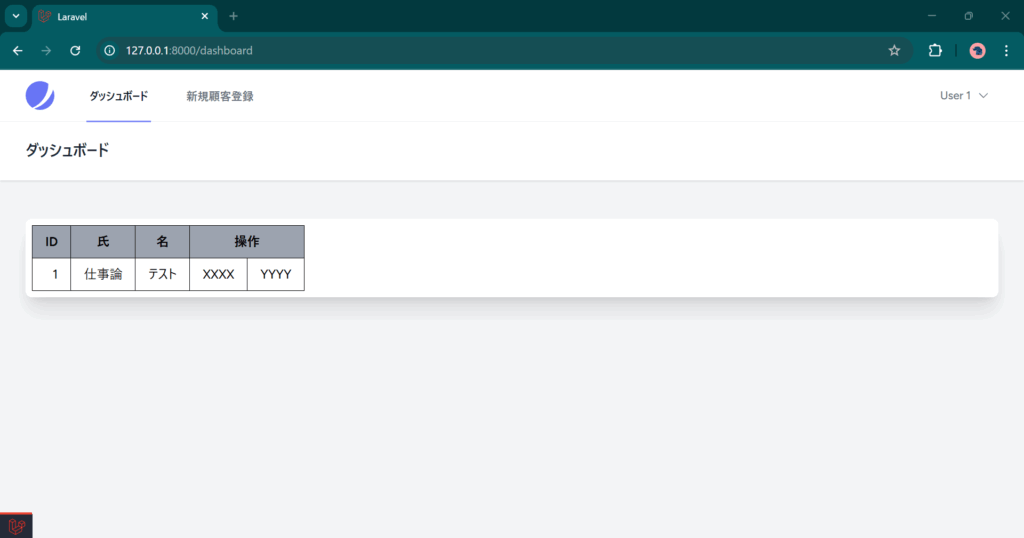
ここでダッシュボードを見ると、次のようになっているはずです。
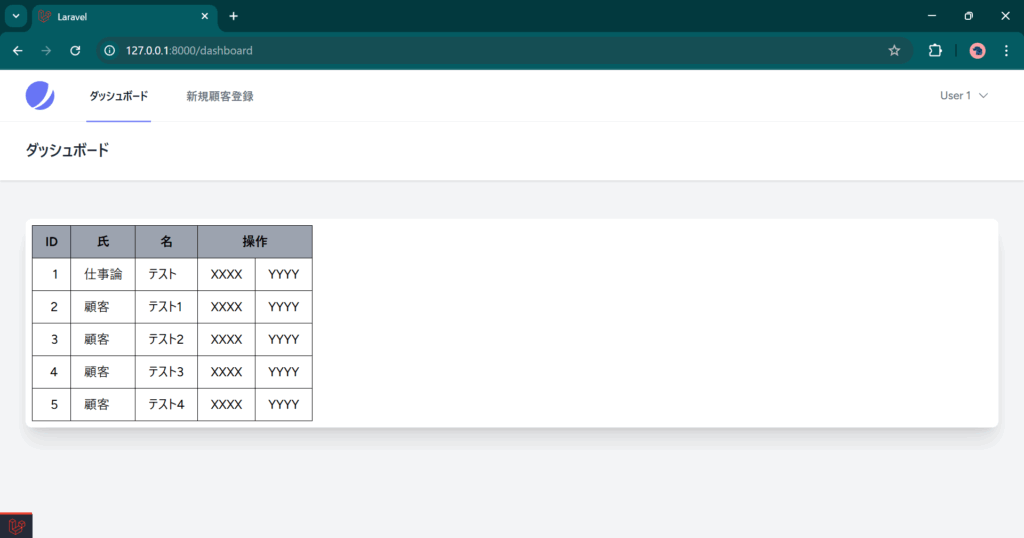
5名の顧客情報を登録すると、次のような画面になります。

コメント